Cryptocurrencies have become a hot topic in recent years, and as the adoption of blockchain technology continues to grow, new digital currencies are emerging. Solana (SOL) is one of the fast-growing cryptocurrencies today, and it’s attracting attention from investors and traders alike. If you’re planning to invest in SOL or any other tokens running on the Solana network, then it’s essential to have a reliable wallet to store your assets. Solflare is one of the most user-friendly and secure wallets for Solana. In this article, we’ll guide you on how to set up and use the Solflare wallet.
Step 1: Download and Install Solflare Wallet
First, you need to visit the Solflare website. On the homepage, click the “Download” button to download the installer for your operating system. After the download is complete, run the installer and follow the instructions to install Solflare on your device.
Step 2: Create a New Wallet
Once you have installed Solflare, you can create a new wallet by clicking the “Create New Wallet” button. You’ll be prompted to create a new password to secure your wallet. Make sure the password is strong and memorable. Once you’ve entered your password, click on “Create Wallet.”
Step 3: Save your Seed Phrase
Next, you’ll be given a seed phrase that acts as a backup for your wallet. This seed phrase consists of 12 words that you should write down and keep in a safe place. Keep your seed phrase safe because it’s the only way you can recover your wallet in case anything happens to it.
Step 4: Receive SOL or Tokens
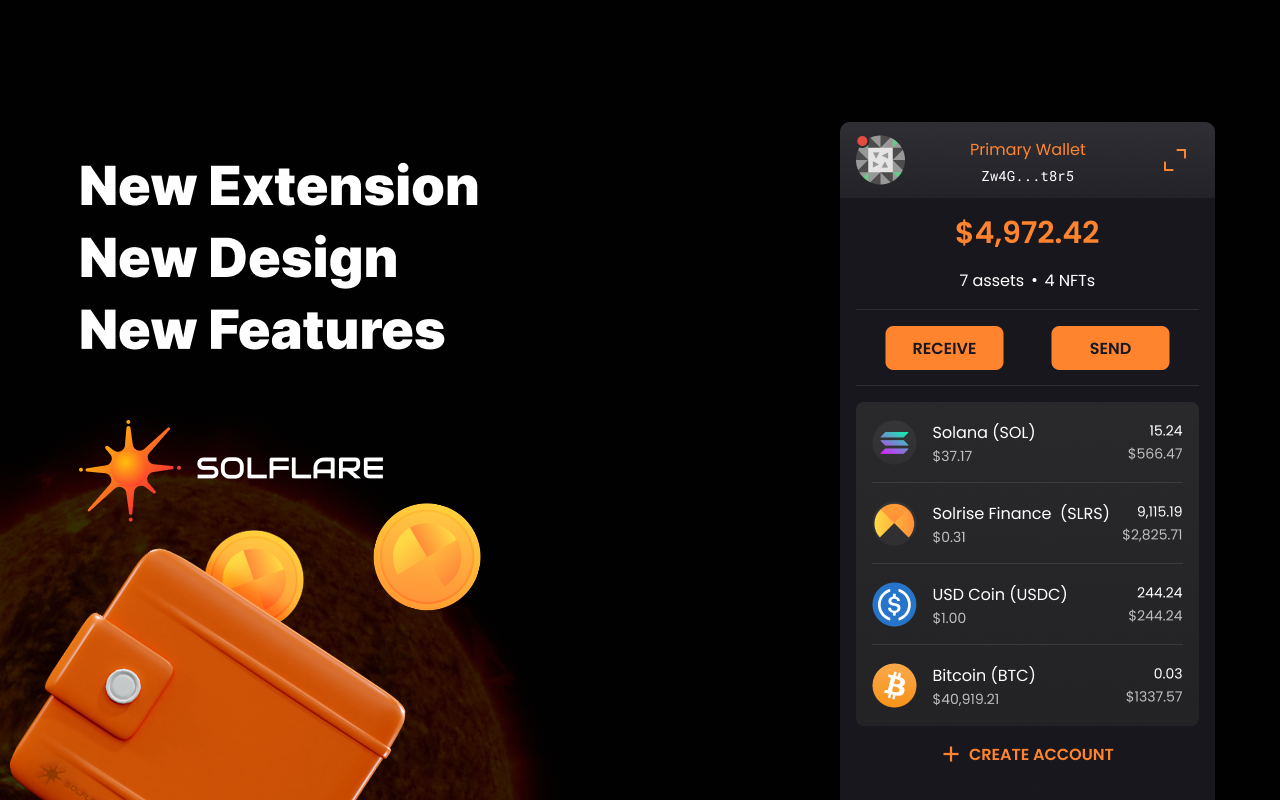
After creating your Solflare wallet, you can receive SOL or any other tokens running on the Solana network. To receive tokens, click on the “Receive” button on the Solflare interface. You’ll be shown your wallet address, which you can share with the sender to receive your SOL or tokens.
Step 5: Send SOL or Tokens
To send SOL or tokens, click on the “Send” button on the Solflare interface. Enter the amount you wish to send and the recipient’s wallet address. Before sending the tokens, confirm the transaction details and verify that you’re sending the tokens to the right wallet address.
Conclusion:
Setting up and using the Solflare wallet is pretty simple, even for beginners. With Solflare, you can store and manage your Solana tokens securely and hassle-free. However, it’s worth noting that while Solflare is user-friendly, it’s always important to stay vigilant and practice good security habits to safeguard your assets. Make sure to keep your seed phrase safe and never share your wallet information with anyone. In conclusion, investing in Solana is a smart move, and having a reliable wallet like Solflare is a crucial step towards securing your investment. We hope this guide has been helpful in setting up and using your Solflare wallet.